PHOTO DIY · ONE PLACEMENT DECISION
Photo Sideways in Your Case Preview? Rotate Before You Crop
If the subject is unintentionally sideways, correct its direction before deciding what to crop. Cropping removes picture area; rotating changes which way the picture faces. A wide photo does not have to become a sideways photo to fit a tall case.
Start with your preferred image, choose the exact phone model, and check its direction in Manual Adjust. Then review the camera area and outer edges. Phone DIY is currently $35; the selected case and final checkout summary remain the source of truth for your order.
Check your photo in Custom Studio →One image, two directions—not two print samples
These are actual October 13 editor screenshots of the same approved peach-flower teaching artwork. The selected option is Clear Hard Polycarbonate Case for iPhone 18 Pro Max. Manual Adjust, Fit, zoom at 1 and centered position are unchanged. We deliberately introduced a 90-degree rotation for the sideways example. This does not reproduce a file-orientation bug, test automatic orientation correction, or show a manufactured case.
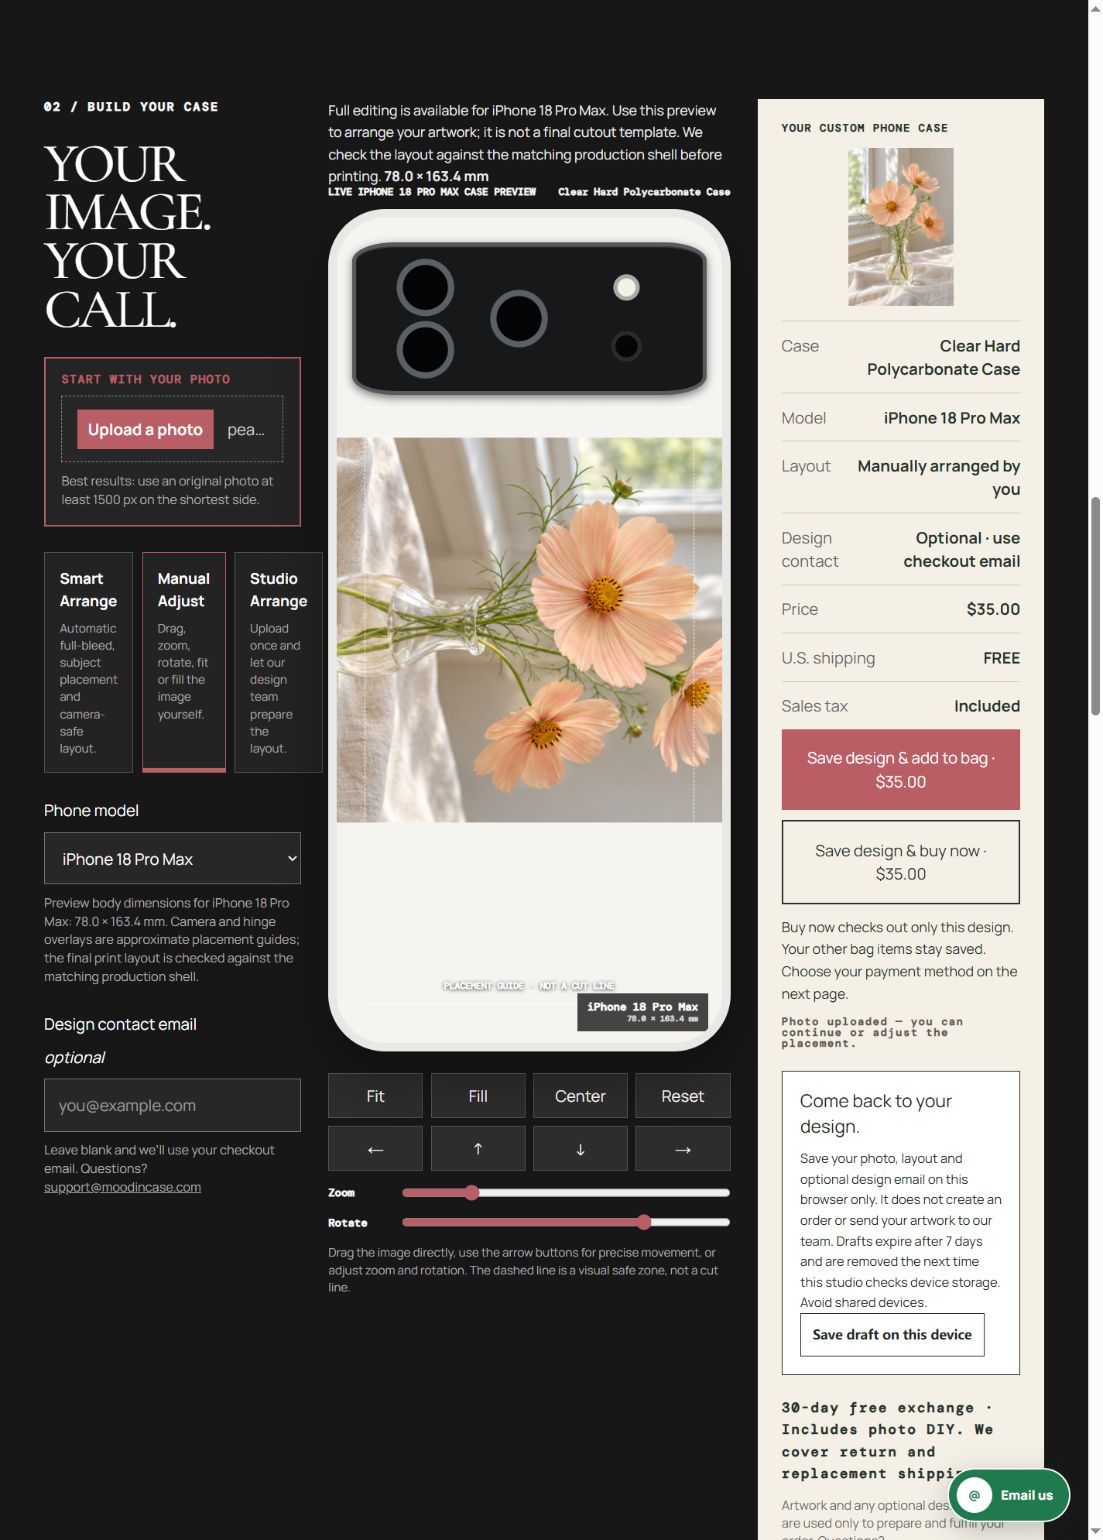
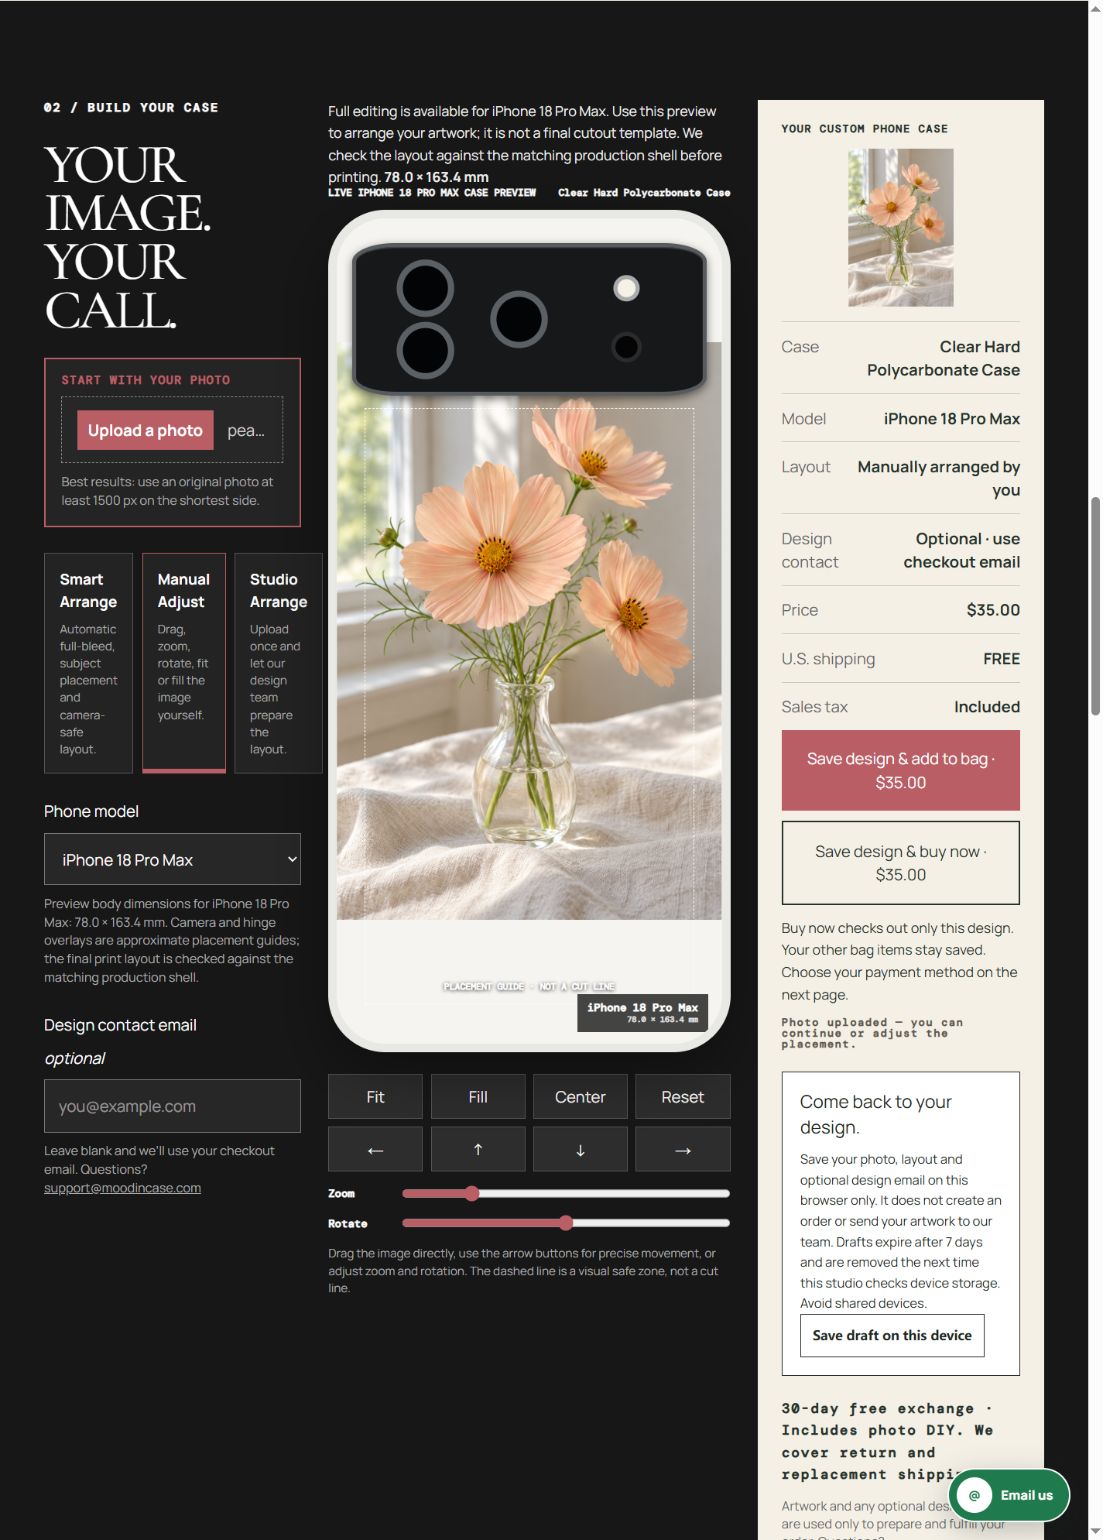
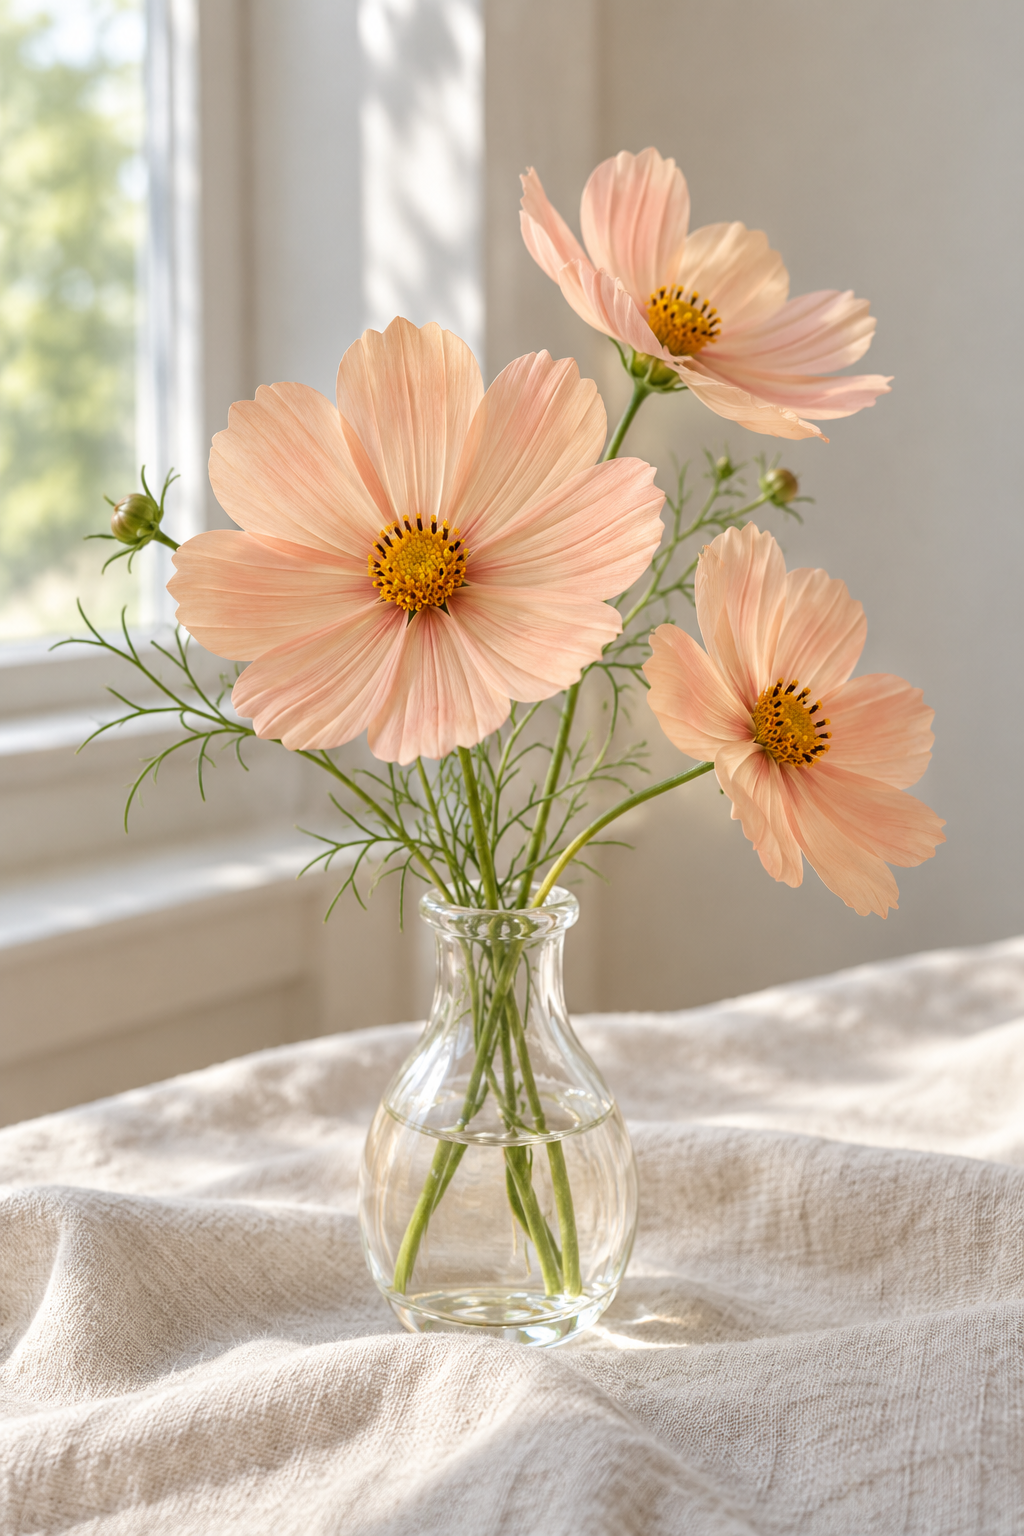
The flower image is AI-generated instructional artwork, not a camera original, customer image, buyer review or physical print. Screenshots show real editor states. Preview geometry is an approximate placement guide, not a production cutting template or a color guarantee.
First decide what “upright” means for your picture
A person standing, a building and a vase usually give you an obvious top and bottom. Text can help too: it should face the direction you intend someone to read it. Abstract artwork may have no required direction. Choose intentionally rather than assuming that the longest edge must run up the case. A horizontal scene can remain horizontal inside a portrait-shaped layout, with space around it.
If the composition is meant to be viewed with the phone held sideways, that can be a deliberate choice. The question is not whether every photo should look vertical. It is whether the preview matches your intended direction. Do this check while the complete source is still available, before removing meaningful edges from a separate copy.
Use the direction control before the crop controls
- Open Custom Studio and select the available construction and exact phone model. Do not use a similar model name as a substitute.
- Choose Manual Adjust and load one PNG, JPG or WebP file, up to 12 MB. Keep the original separately.
- Start with Fit to inspect the picture. If it faces the wrong way, use Rotate until the subject has the direction you intended.
- Now inspect the entire preview. Rotating within the case can change which details are clipped; Fit is not a promise that every rotated corner will remain visible.
- Only after that, decide whether to reposition, zoom or try Fill. Recheck the direction and important details after any change.
For this comparison we kept the other controls fixed so you can see the rotation decision by itself. Your final composition may need a different position or scale. Those are subsequent choices, not evidence that the rotation control restored lost image detail.
Rotation is not mirroring or straightening
If lettering reads backward, turning the picture is not the same as flipping it. Check the source file in your photo app before uploading. This guide does not promise a mirror control in the studio. Likewise, a slightly tilted horizon is a leveling decision, not an unintended quarter-turn. Correct only what you actually see; do not rotate a useful composition simply because the case outline is tall.
Keep a separate copy if you make changes outside the editor. Avoid repeatedly exporting over the only original. If two apps display the same file differently, compare the visible image before proceeding. We have not tested every phone, export format or orientation-metadata combination, so this demonstration cannot diagnose why a particular file looks different.
Check the camera area again after turning the image
A corrected direction can move a face, a word or a flower toward the camera opening. Look at those details on the exact selected model, not just the small upload thumbnail. In our upright flower example, the camera overlay still covers part of the upper composition. That is a reason to continue the placement review, not a reason to call the screenshot a print-ready proof.
The dashed guide and camera overlay help you consider placement. They are not measured cut lines. A screen preview does not establish the finished edge, color or protection performance of the shell. If an important detail remains difficult to place, choose Studio Arrange and describe which direction and subject must be preserved, or email the studio before ordering.
Review the design before you review payment
Confirm the selected model, case, intended direction and important details before continuing. The design contact email is optional; checkout uses an order email. A locally saved draft is not an order, payment or proof that the studio received your artwork. Use images you have the right to print, and leave out addresses or other private information you do not want on the case.
Check the total and choose your payment method on the next page. Opening checkout or selecting Stripe does not itself confirm payment. If the result is uncertain, check the existing payment status or contact support with the order reference instead of paying again. Read the linked shipping and return policies for the actual conditions; this placement guide does not create a delivery promise.