Camera Original or Screenshot: Which Photo Should You Use for a Case?
· Mood In Case editorial
Phone DIY $35 · iPad DIY $39.90
Create your case →Choose the file with the useful detail
When the same memory exists as a camera photo and a screenshot, start with the original camera file. It usually avoids the borders and interface elements that come with capturing a screen. But a file called original is not automatically sharp: check the actual picture. This guide helps you compare those two files before making a Mood In Case design. It does not claim that the editor can reconstruct missing facial details or reverse heavy compression.
Inspect detail, not just the thumbnail
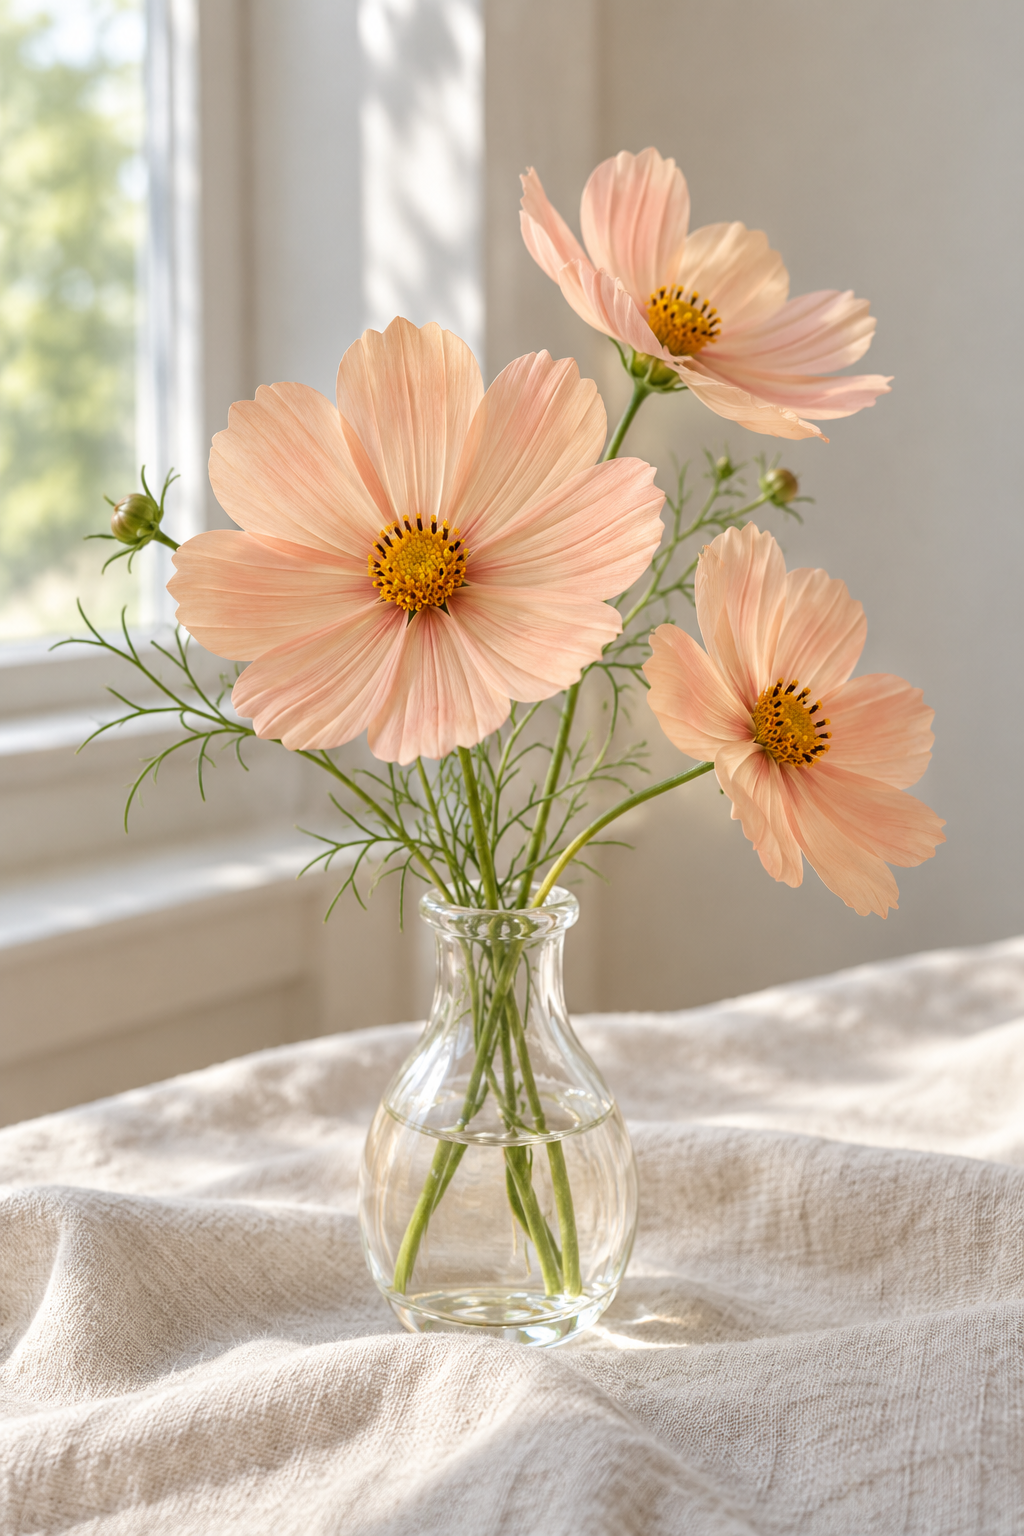
Open the full-size example (PNG, 2.21 MB)
Use your own original and screenshot for the actual comparison. Inspect the same detail at the same intended crop; this illustration does not measure screenshot quality or predict print sharpness.
A large screenshot file can contain a small photo
In this genuine browser capture, the whole saved screenshot is 1130 × 1792 pixels, but the flower picture occupied only 320 × 480 CSS pixels on the page. The source file is 1024 × 1536 pixels. Page text and empty space make up the rest of the screenshot; they do not add photo detail. CSS dimensions describe this displayed view, not a universal screen-to-file pixel ratio.
View the genuine screenshot and its surrounding page
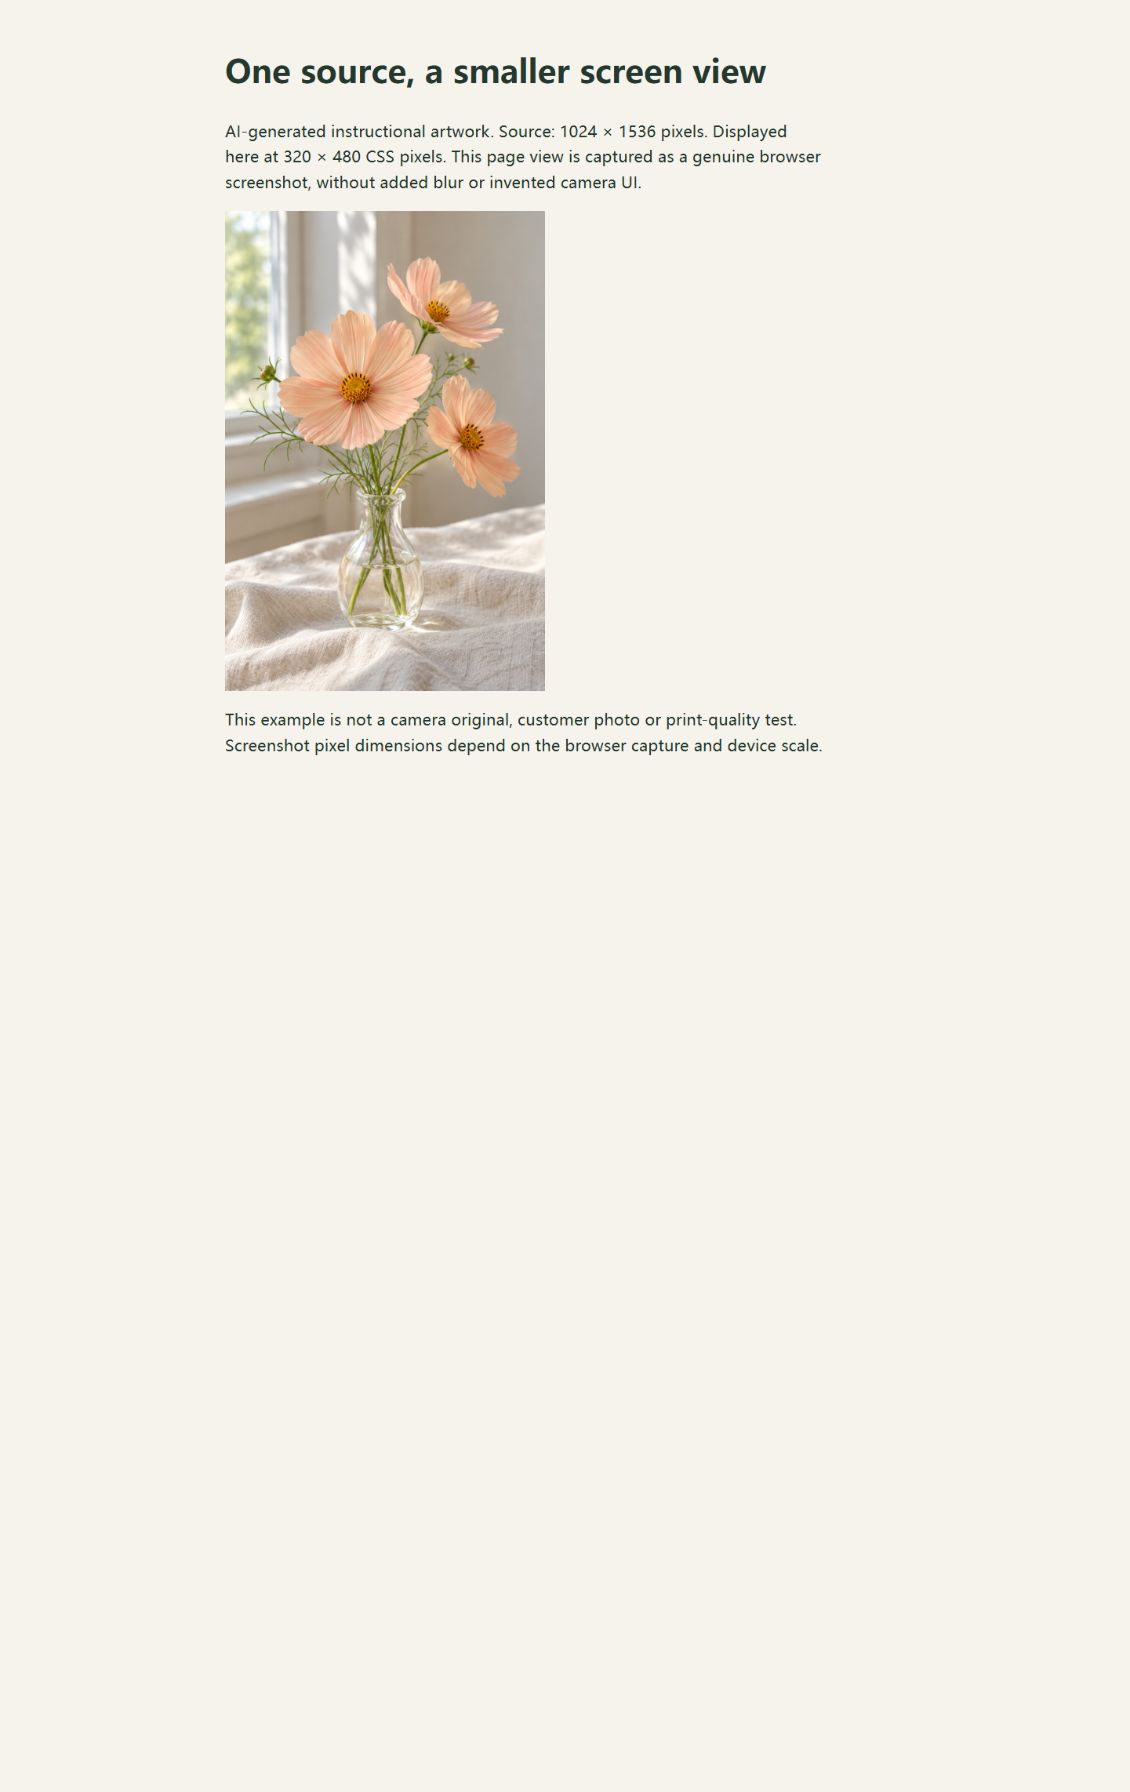
Check the image area as well as the whole file dimensions. Do not conclude that every screenshot is unusable: inspect your actual file and crop. This example documents one capture, not a sharpness score.
This example is 1024 × 1536 pixels, below the studio’s recommendation of at least 1500 pixels on the shortest side. It demonstrates placement, not a recommended print-quality source.
See what Fit and Fill change
These actual Custom Studio captures use the same AI-generated artwork, Clear Hard Polycarbonate Case and iPhone 16 Pro selection. Only the Fit/Fill control changes. Fit leaves space above and below this image; Fill covers the case but crops some side petals. Neither view restores detail missing from the source.
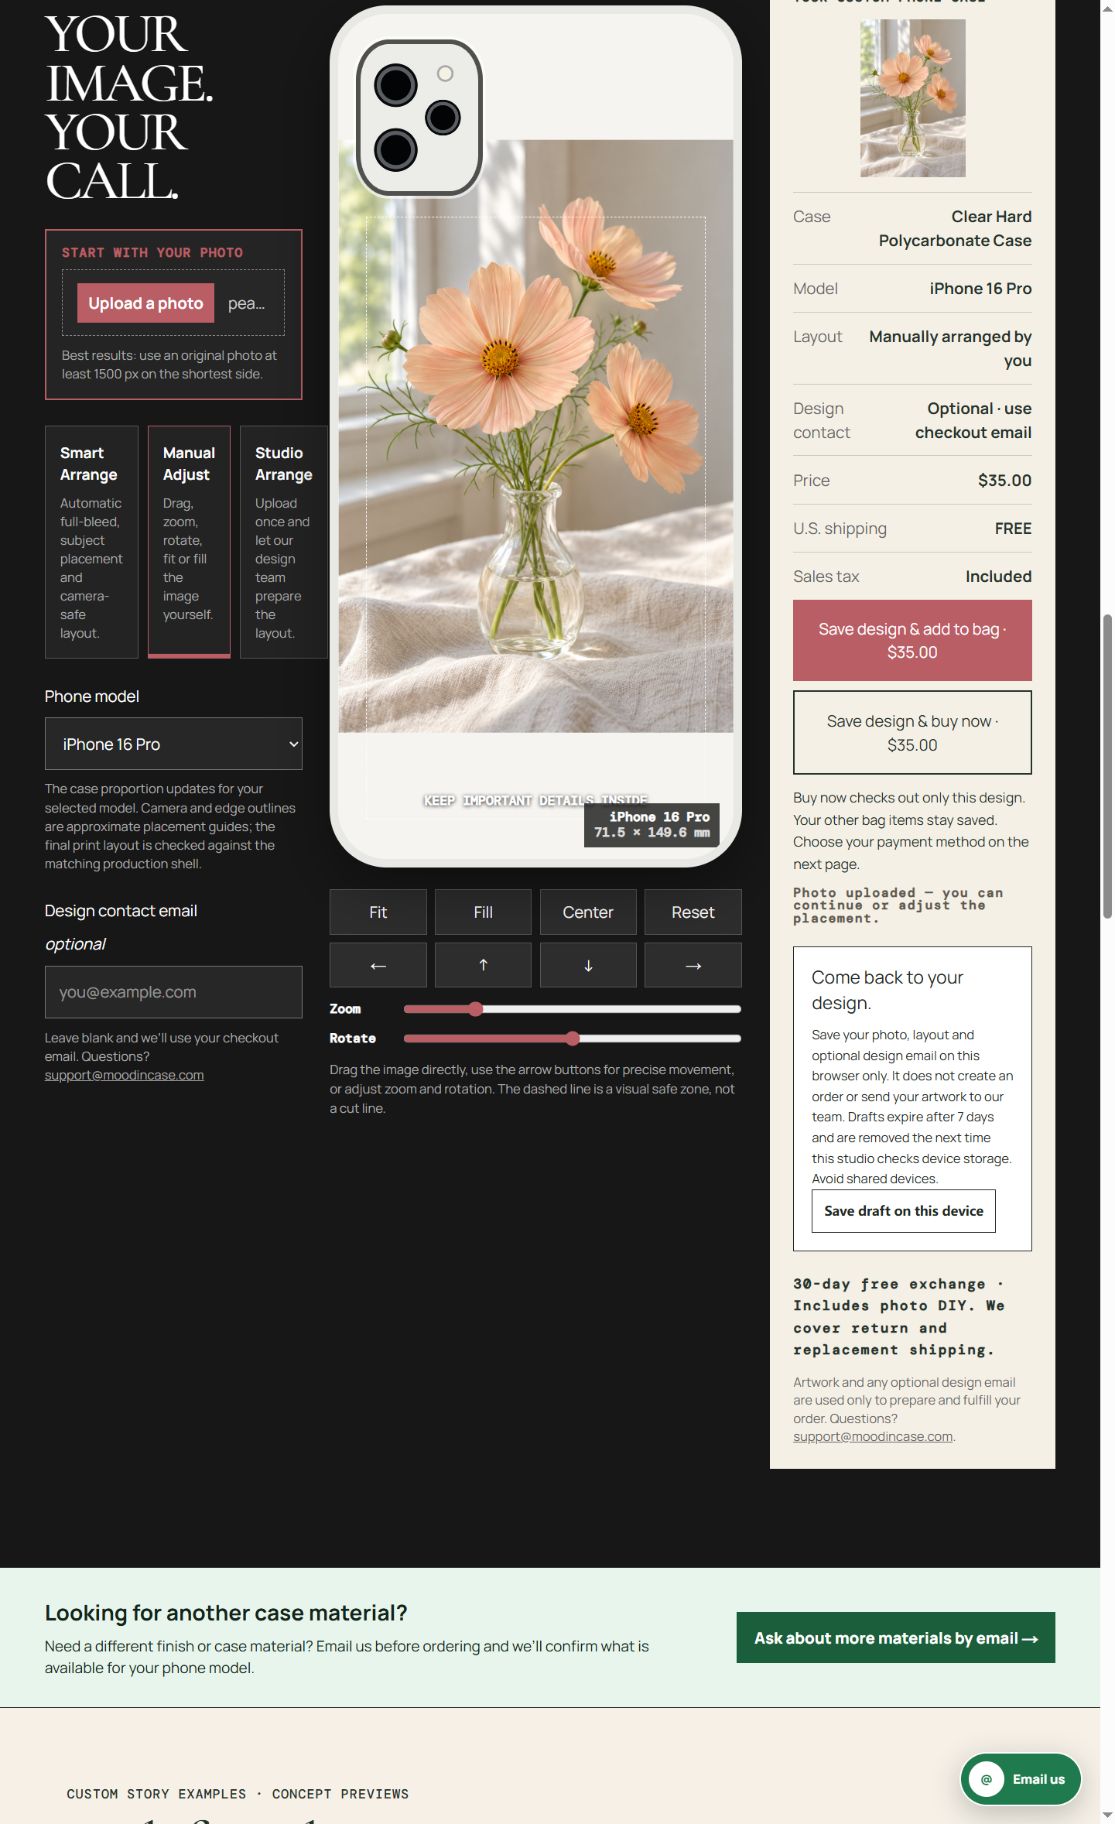
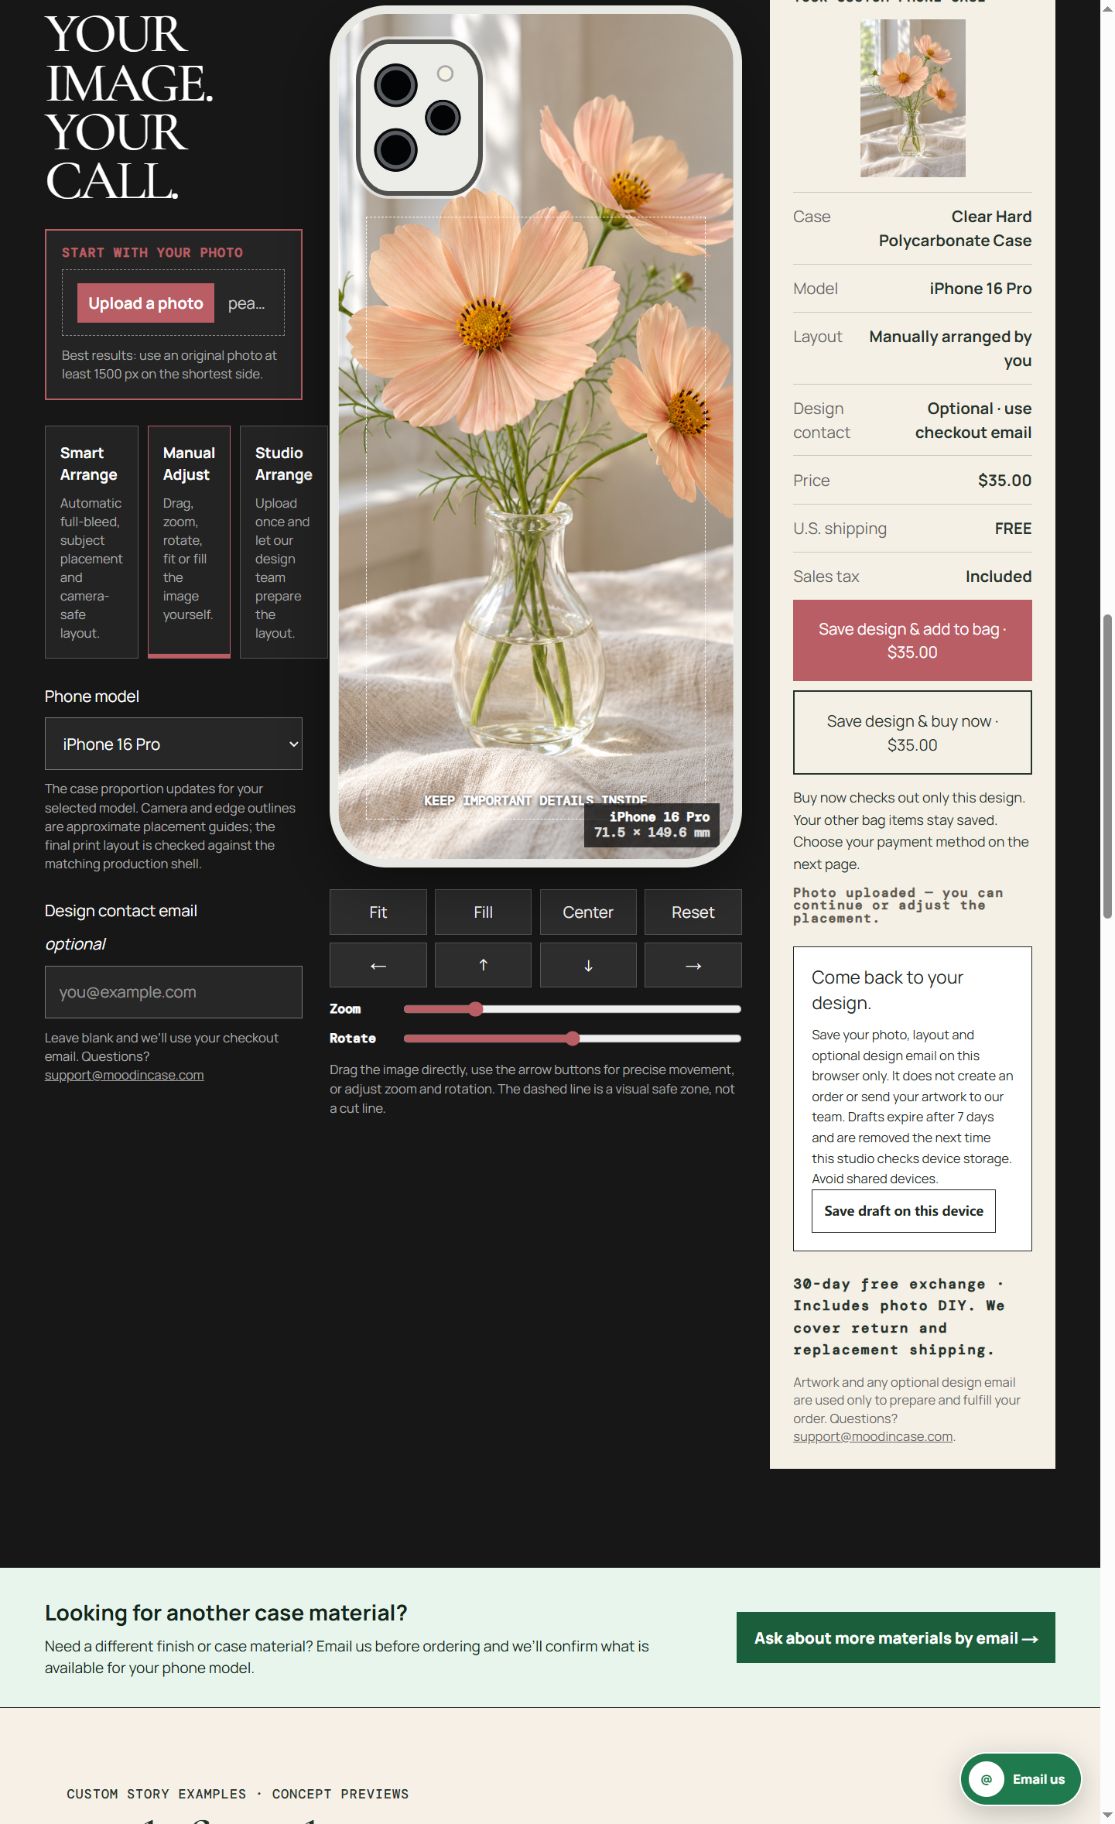
Captured October 5, 2026 (Beijing time). Camera and edge outlines are approximate placement guides, not production templates. Check the current model, price and options in the studio before ordering. This demonstration did not create an order or complete payment.
Look beyond the thumbnail
Open both files at full size and inspect the same small area, such as an eye, a strand of hair or a line of clothing. A thumbnail hides softness because it displays fewer pixels. Look for blocky edges, smeared texture and distracting borders. Do not use file size alone as your decision rule: two files can have different compression settings. Pick the version whose important subject remains clearer at the crop you intend to use.
Understand what the screenshot contains
A screenshot records the view displayed on your screen. That view may include app controls, black bars, captions or unused space around the photograph. Cropping those away leaves less of the screenshot for the actual image. The picture may also have been displayed smaller than its original dimensions. Before editing, check the camera library or the person who took the photograph for the original file. A clean copy of that file avoids several unnecessary steps.
If a screenshot is all you have
You can still inspect it honestly. Crop away controls and borders in a separate copy, leaving a little space around faces. View the result at full size and consider a looser layout that does not enlarge a tiny subject as much. Do not repeatedly resave the file while experimenting. Keep the first screenshot so you can return to it. If the important detail is too soft, choosing a different photograph may work better than trying to hide the problem with filters.
Separate image quality from emotional value
The most meaningful photograph is not always the sharpest one. Decide which matters more for this particular design: a specific moment or a clearer portrait from nearby in time. You can choose the meaningful image while understanding its limits. The studio preview lets you judge placement, but it cannot promise that a blurred source will print sharply. If you need advice, email the studio before ordering and explain what you want to preserve; do not send payment-card information.
Test the file on the selected case
Choose the exact phone model and a case construction before placing the photo. The current selector includes Clear Hard Polycarbonate Case and Clear Flexible TPU Case among its options. Their available models determine what you can choose; similar device names do not establish fit. Start with Fit to see the complete image, then try Fill only if you are comfortable losing some edges. Keep faces and important text away from the camera opening.
Upload once and review the actual crop
Use one PNG, JPG or WebP image up to 12 MB. If you want a collage, prepare one combined file first. Smart Arrange provides a starting layout; Manual Adjust gives you control over position, zoom and rotation. Studio Arrange is available when you want placement help. Review the result after changing the model or construction, since the useful image area can change. A preview is not a guarantee of exact color or the final printed edge.
Confirm the design and the order separately
Mood In Case phone DIY is $35, with iPad DIY available separately at $39.90. Verify the device, selected construction and final total at checkout. Saving a local draft only preserves work in that browser; it does not submit an order or take payment. Keep the original file somewhere you control. If you leave a checkout, use its payment status and resume option when available. An unfinished payment screen does not mean that your case is already paid for.
Before ordering, read the shipping and return conditions linked from the studio. Production and delivery are separate from saving a layout. A payment provider may show an unfinished checkout even after you leave the page, so use the order reference when asking the team to check its status. Your uploaded image is for preparing and fulfilling the design, not automatic permission to publish it as a review. Choose a photograph or artwork you have the right to use, and leave out private details you do not want printed.
Before you begin
Which upload formats are supported?
Use one PNG, JPG or WebP file up to 12 MB. Keep the original separately and combine a collage into one file before uploading.
Can I ask for help with the layout?
Yes. Choose Studio Arrange and explain which details matter. For model or artwork questions, email support@moodincase.com. The design contact email is optional; checkout uses an order email.
Does a saved draft mean the case is ordered?
No. A local draft is stored in that browser and is not an order or payment. Review the design and complete checkout when ready.
What if my exact model is not listed?
Do not choose a similarly named device as a substitute. Check the model in your device settings and email the studio with the exact name before ordering. Screen size alone does not confirm shell fit.